
Buildings and Layout: Functional Colony Zoning
Design for short, observable flows and spare access. A layout should survive new buildings and changing workloads.

Table of contents
There is no trustworthy universal “best layout” for a colony whose terrain, workforce, research, policies, and production targets keep changing. A useful layout does something more durable: it makes flow, access, staffing, and expansion readable.
Zone by function, connect by flow
Think in four functional zones. They may overlap, but each needs a clear job.
| Zone | Keep close to | Main risk |
|---|---|---|
| Extraction | The resource and collection point | Long return trips and idle carriers |
| Conversion | Input storage and the next processor | Cross-traffic and blocked output |
| Civic and life support | Citizens, housing, food, government | Pulling labor too far from daily needs |
| Research and specialist work | Stable staffing and required inputs | Starving essential production for prestige work |
The important line is not a decorative district boundary. It is the route between input, worker, building, output, and destination.
Place a building with five questions
Before confirming placement, ask:
- What arrives here? Name the input and where it comes from.
- Who works here? Check that the assignment does not empty another essential role.
- What leaves here? Identify output storage and the next consumer.
- How does traffic reach it? Preserve access for workers, carriers, and construction.
- What will be built beside it later? Leave a real expansion edge instead of filling every gap.
The current building tools include snapping, vertical alignment, height adjustment, and drag-building behavior. These help you place cleanly; they do not solve the production chain for you.
Separate throughput from capacity
A second processor increases capacity. It does not increase input supply, hauling, storage, or qualified labor. Before duplicating a building, determine which part is saturated:
- Input store is empty: expand extraction or delivery.
- Input exists elsewhere: improve hauling or route length.
- Worker is idle with input present: inspect production request and output.
- Output store is full: add consumption, destination space, or movement.
- Everything moves but demand is unmet: then add process capacity.
This order prevents “solution buildings” from becoming new consumers in an already constrained colony.
Storage and transport are layout tools
Warehouses and Resource Transport Stations are not passive containers. Their location changes how long the production graph takes to complete. Put buffers where they shorten a real repeated route, not where an empty tile looks tidy.
Good buffer locations usually sit:
- between a high-volume extractor and its processor;
- between several processors and a shared consumer;
- near a remote work cluster whose carriers otherwise cross the whole colony;
- at a point where you can see whether input or output is accumulating.
The final point matters: readable storage gives you telemetry. One giant mixed stockpile can hide which link is actually failing.
Food and life-support example
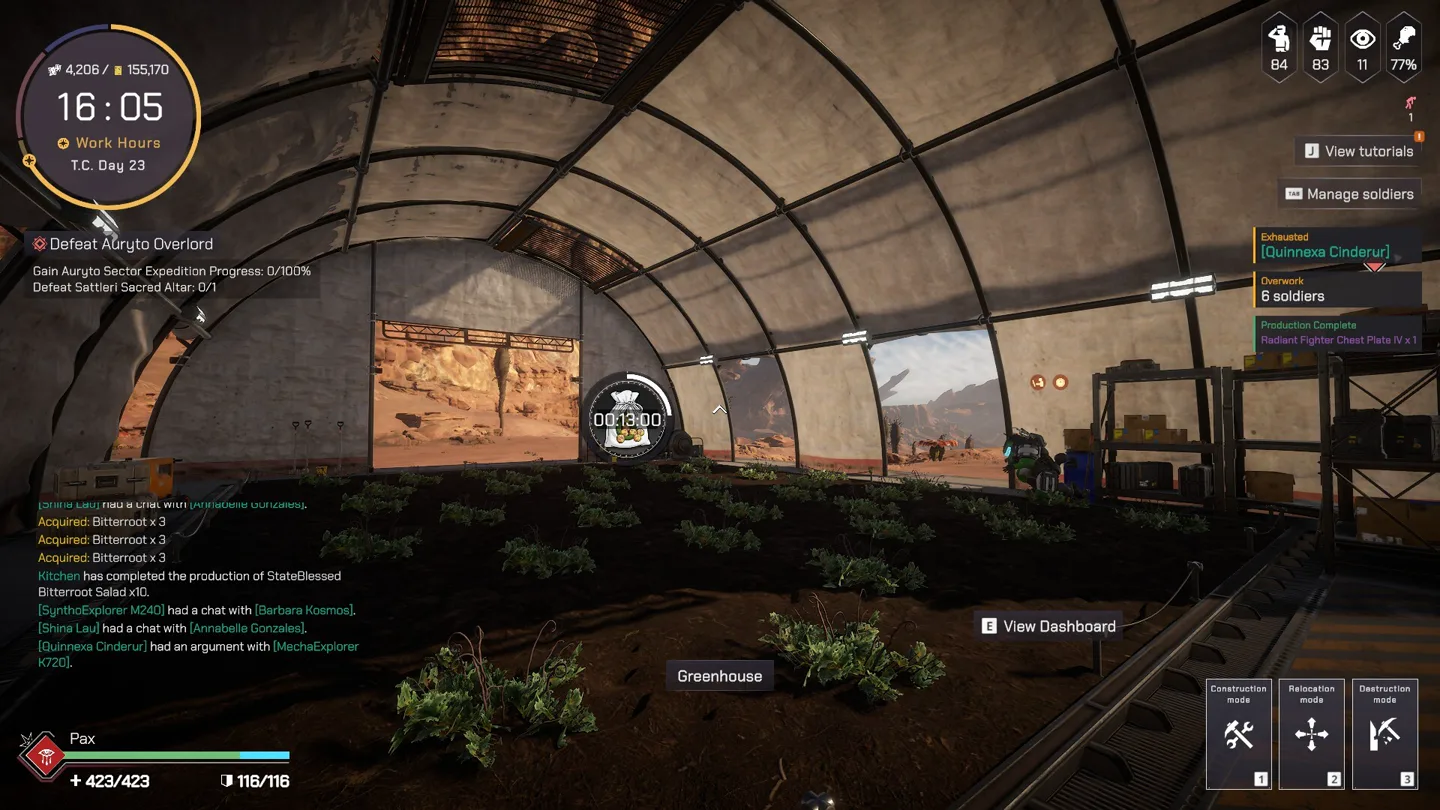
The current Greenhouse view shows why a building cannot be judged alone. A Greenhouse needs placement, a worker suited to planting, continued inputs and space for output. That output then participates in food production or another downstream need. Expanding the building without protecting carriers, cooking, and storage can increase raw output while citizens still experience shortage.
A layout audit you can repeat
Walk one product from start to finish:
- Stand at or select the resource origin.
- Follow the path to input storage.
- Check the assigned worker and process building.
- Follow output to its store.
- Continue to the consumer or crafting step.
- Count the crossings, dead ends, and long returns.
Do this for food, construction material, research support, and one combat item. Those four walks reveal more than copying a screenshot of somebody else’s finished colony.
Use Jobs and Production when the route looks correct but the line still stops. Use Resources and Recipes to identify the bounded set of named buildings and the current readable crafting example.
Related guides
Jobs and Production: Diagnose the Bottleneck
Match visible work attributes to jobs and trace stalled production from input to worker to output.
Read guideResources and Recipes: Current Production Reference
A bounded index of readable buildings and one current weapon recipe, plus a method for tracing unknown materials.
Read guideResearch Tree: Read Prerequisites, Queue, and Time
Understand dependency edges, research rate, queue decisions, and a current unlock example.
Read guide